The AV receiver is the heart of your home theater. It is around this device that all of your audio and video sources are combined. It allows you to experience the magic of the cinema, with all of its humor, drama, and action. However, the quality of your experience is only as good as the quality of your AV receiver. That is why it is so important to take the time to set up your AV receiver correctly and to get the best possible sound quality from it.
There are a few things that you need to do to set up your AV receiver correctly. The first is ensuring your receiver and speakers are properly connected. The second is calibrating your system to optimize the sound for your particular room. And the third is making a good sound.
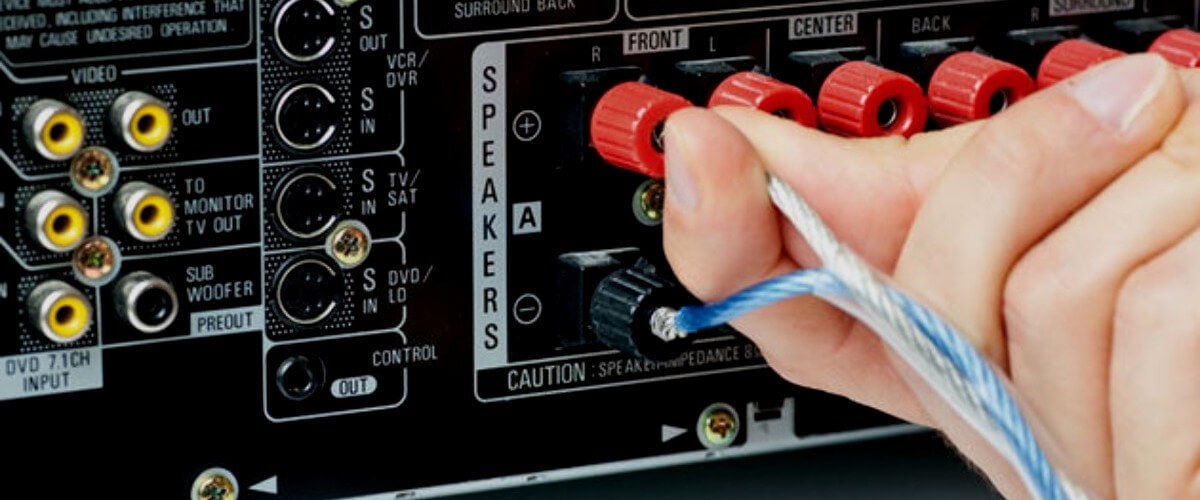
Source connection
Turning off the unit before connecting speakers, subwoofer and sources are best. It will avoid loud clicks, short circuits, and other possible annoyances to your system. In addition, almost all receivers have signed inputs. For some, color-coding the outputs makes connecting five or more speakers easy.
If you want to watch 4K HDR content, look for the “HDCP2.2” label above the HDMI input. On some models, only a few HDMI ports are HDCP2.2-certified; you should connect your 4K Blu-ray player to those ports.
You may also notice that each HDMI input is designed for a specific type of device. For example, one input might be for a Blu-ray player, while another might be for a cable box. The manufacturer has optimized the performance of these inputs for specific devices. For example, the input for a Blu-ray player might have the shortest signal path to the processor, ensuring maximum playback quality.
You should be aware of two more connection options: we always recommend choosing a wired Ethernet connection – it is more stable and reliable than Wi-Fi. The USB port on the front panel is for playing files from a flash drive.
Calibration
Most receivers have a microphone that you can use to set it up. Then, when you are prompted, run the auto-calibration procedure. It will measure the characteristics of your speakers and the room and adjust the distance between the speakers and their volume levels. Some more expensive receivers also optimize sound based on the situation.
It is better to perform AV receiver auto-calibration immediately after connecting all sources to eliminate this process and start listening to your new home theater faster.
The sound of the system will not be optimal without calibration. First, you need to connect the microphone and then follow all the instructions on the screen. Be sure to do everything, even if it takes a few minutes. Some calibration functions will only take a few seconds, but others may take longer because multiple parameters are being measured.
If you have installed Dolby Atmos speakers, inform the receiver before starting calibration.
First, enter the speaker setup menu. You will then need to specify how your speakers are set up – either Atmos speakers that emit sound upwards or installed on the ceiling. After that, the receiver can calibrate them correctly. Make sure you have a tape measure to get the height of your room correct.
You need to specify how many subwoofers you have in your system- one or two. Set their volume to about half, calibrate, and adjust if necessary while watching a movie clip.
If an error occurs during the measurement process during calibration for one or more speakers, check that they are connected to the correct outputs.
Almost all calibration systems today are pretty accurate. But it is still worth checking the manual settings and ensuring everything is correct. If something sounds unpleasant, it might mean something is installed incorrectly. You can fix this.
Sometimes people think that prominent speakers are small or small speakers are big. But it’s important to remember that if you change the size or shape of the speakers or move them around in your room, you need to do a new calibration.
Surround modes and sound processing
Look for cables that are called “straight,” “direct,” or “pure direct.” It means that the signal from the source is transferred to the output most accurately.
Each manufacturer has a range of modes. In most cases, they turn off the circuits that are not currently needed. It helps reduce distortion and eliminate interference. In addition, this makes the signal purer.
On the other hand, your model may support unique modes for playing Dolby Atmos or DTS:X soundtracks. It will allow you to experience surround sound with even more depth and clarity.
If you plan to listen to different types of content using your AV receivers, like movies, sports, video games, and stereo music, it is worth creating bookmarks with your settings for each. It will save you time to re-adjust sound settings whenever you change formats. For example, create a cinematic mode for movies, 2-channel stereo for listening to music, and DSP tuning for video games.